Sunday, August 21, 2011

Espresso Coffee Ice Cream

Oh excuse me. I have been too busy trying a few extra recipes this month, I lost my touch of 'story paragraph' in front of the recipes! I promise I will add them back... or maybe not. Well the story for this one is I <3 ice cream. Obviously, why else would I want to make them. Funny thing is everyone somehow associates me with liking ice cream a lot. But I'm actually not that crazy about it, I enjoy it and I only enjoy a handful of flavours. The flavours are always mint chocolate, chocolate, and coffee. So anything with chocolate and coffee I'm down for. Other flavours I don't like so much.

Why I chose my first ice cream making experience to be coffee flavour is because I am never satisfied with the grocery store bought coffee flavour ice cream. The ice cream or gelato shop ones are good but always buying a scoop or two. So with Haley's help (i.e. using her ice cream machine) I get to fulfill this want.

After trying this I might actually seriously consider getting a ice cream machine. It is very easy to use. And if it satisfy my specific ice cream cravings like my super strong coffee or some interesting asian flavour green tea and sesame, I'd be willing to spend the time to make some.

Espresso Coffee Ice Cream
Expresso Coffee Ice Cream served with Banana Bread

Ingredients:
1½ cups skim milk
¾ cup sugar
1½ cups whole coffee beans
Pinch of salt
1½ cups heavy cream (18%), divided
5 large egg yolks
¼ tsp. vanilla extract
1/3 cup semi-sweet chocolate chips

Steeping coffee flavour

After adding the egg mixture to the coffee bean mixture

Espresso coffee ice cream mixture before freezing in the ice cream machine

The final product


Procedure: 
1. Combine the milk, sugar, coffee beans, salt and ½ cup of the heavy cream in a medium saucepan over medium-high heat.  Once the mixture is warm and just begins to bubble, remove from the heat and let steep at room temperature for 1 hour.

2. After steeping, return the saucepan with the coffee mixture to the burner over medium heat. In a separate bowl, whisk the egg yolks until smooth.  Once the coffee mixture has become warm again, slowly pour the mixture into the bowl with the egg yolks, whisking constantly to temper the eggs.  Return the egg-coffee bean mixture to the saucepan over medium high heat.

3. Cook the mixture, stirring constantly and scraping the bottom, until the mixture thickens and coats the spatula or spoon (about 170-175° F.)  Pour the remaining 1 cup heavy cream into a large bowl and set a mesh strainer over the top.  Pour the custard through the strainer and stir it into the cream.

4. Press on the coffee beans in the strainer to extract as much of the coffee flavor as possible, then discard the beans (I first used a spoon to do this. But the colour of the mixture still seems a bit too light. So I took some coffee beans and blended it lightly and soak in the custard mixture with strainer. )  Mix in the vanilla and ground coffee or espresso powder.

5. Chill the batter over an ice bath, or in the refrigerator.  Chill thoroughly in the refrigerator and then freeze in an ice cream maker according to the manufacturer’s instructions. Add semi-sweet chocolate chips in the last 5 minutes before the ice cream is done. Add more chocolate chips for decoration.

Source: adapted from The Perfect Scoop by David Lebovitz and Annie's Eats

Thoughts:
1. Very very rich flavours! I chose a dark roast espresso coffee beans, so 1 1/2 cups of beans seem a little too strong to eat by itself. It was prefect with my warm banana bread though. Although I like how strong it is. Probably can use less beans like 1 cup, or add another cup of milk or water to dilute it since this recipe yields more like 1L of ice cream.
2. Maybe next time try a lighter cream like half and half or 10% to lower the fat content even more. Also a shot of baileys may help with the freezing given the lower fat creams.

Banana Bread


Ingredients:
1¾ cups all-purpose flour
1 tsp. baking soda
½ tsp. salt
6 large, very ripe bananas (about 2¼ lbs.), peeled
8 tbsp. unsalted butter, melted and cooled slightly
2 large eggs
¾ cup packed light brown sugar
1 tsp. vanilla extract
2 tsp. granulated sugar
1/3 cup semi-sweet chocolate chips

Procedure:
1. Preheat the oven to 350˚ F.  Lightly spray a loaf pan (about 9 x 5 inches) with cooking spray.  In a medium bowl, combine the flour, baking soda and salt; whisk together and set aside.

2. Place 5 bananas in a microwave safe bowl; cover with plastic wrap and make several slits in the wrap to act as steam vents.  Microwave on high until the bananas are soft and have released liquid, about 5 minutes. 

3. In a large bowl, combine the bananas and the reduced banana liquid (or 1/4 cup water).  Mash with a potato masher or whisk until fairly smooth.  Whisk in the melted butter, eggs, brown sugar and vanilla.  Add the dry ingredients to the bowl with the banana mixture.  Fold together gently, just until all of the dry ingredients are incorporated.  Add the semi-sweet chocolate chips and mix well. Pour the batter into the prepared pan and smooth with a spatula.

4. Slice the remaining banana diagonally into ¼-inch thick slices.  Layer the banana slices along both sides of the top of the batter, leaving a couple of inches in the center to allow an even rise.

5. Sprinkle the sugar evenly over the assembled loaf.
Bake until a toothpick inserted in the center comes out clean, 55-75 minutes.  Transfer to a wire rack and allow to cool at least 15 minutes in the pan before removing.  Continue to cool and serve warm or at room temperature.

Source: Adapted from Annie's Eats

Thoughts:
1. The banana bread used only 55 minutes to bake. And it is moist inside which is a success.
2. I kinda like the cooked banana on the top. It may be too mushy for some people.
3. Definately can have a bit more chocolate chips to make it even tastier!
4. Excellent with my homemade espresso coffee ice cream :D yum!

Friday, August 19, 2011

Strawberry Pie


Ingredients:
Filling:
2 lbs. fresh strawberries, gently rinsed and dried, hulled
11/4 cup sugar
3 tbsp. cornstarch
Generous pinch table salt
1 tbsp. freshly squeezed lemon juice

Pie Crust: (One 9 inch pie crust, double the recipe to make a double crust pie)
1¼ cups all-purpose flour
1 tbsp. sugar
¼ tsp. salt
8 tbsp. cold, unsalted butter, cut into small pieces
3 tbsp. very cold water

Procedure:
1. Combine the flour, sugar and salt in the bowl of a stand mixer fitted with the paddle attachment.  Mix briefly to blend.  Add in the butter pieces and mix on medium-low speed to cut the butter into the flour until the mixture resembles coarse sand and the largest butter pieces are not much bigger than peas.  Mix in the cold water on low speed just until the dough comes together.
2. Shape the dough into a ball, wrap in plastic wrap and chill in the refrigerator for at least 30 minutes.  (This dough can be frozen for up to 2 months.)
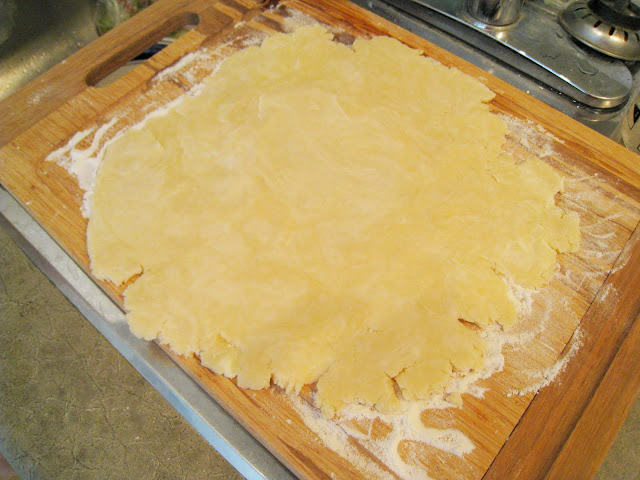
3. Remove from the refrigerator. Roll out one disk of pie crust on a well-floured surface into a 12-inch round.  Line a 9-inch pie plate with the crust. Cool in the fridge for another 30 minutes.
4. When you are ready to bake the pie, preheat the oven to 400˚ F. To make the filling, select 6 oz. misshapen, underripe or otherwise unattractive berries, halving those that are large; you should have about 1½ cups.  In the food processor, process the berries to a smooth puree, about 30 seconds.  You should have about ¾ cup puree.
5. In a medium saucepan, combine the sugar, cornstarch, Sure-Jell and salt; whisk to combine.  Stir in the berry puree.  Cook the mixture over medium-high heat, stirring constantly, and bring to a full boil.  Boil for 2 minutes, scraping the bottom and sides of the pan constantly.  Transfer to a large bowl and stir in the lemon juice.  Let cool to room temperature. Meanwhile, pick over the remaining berries and measure out 2 pounds of the most attractive ones; halve only extra-large berries.  Add the berries to the bowl with the glaze and fold gently with a spatula until the berries are evenly coated.  Scoop the berries into the pie shell, piling into a mound.
6.  Roll out the remaining disk of pie dough and cut into thin strips.  Use the strips to form a lattice over the top of the filling.  Cut off the excess crust and pinch the edges together, using your fingers to create a fluted pattern.  Lightly brush the top crust of the pie with beaten egg.
7. Place the assembled pie on the upper rack of the oven (top-middle position).  Place a rimmed baking sheet on the lower oven rack beneath the pie.  Bake, rotating halfway through baking, until the crust is golden and the filling is bubbling, about 60-70 minutes.  If the crust seems to be browning too quickly, loosely tent with foil to prevent over-browning.  Let cool on a wire rack to room temperature.

Adapted from Annie's Eats Cranberry Blueberry Pie and Strawberry Pie

Thoughts:
1. Toooo much water! Use more corn starch or other ways to make it less watery
2. A bit on the sour side... need more sugar

Tuesday, August 2, 2011

Strawberry Cream Cheese Tart

Annnnnnnnnnnnd the next part of our strawberry-picking day is baking strawberry goodies. And that includes our second item strawberry cream cheese tart. This one was baked with Zoey and her expertise in baking really helped us get through all of steps. What a triumph baking this with her. She taught me so many techniques and things to look for :)


Ingredients:
For the crust: (makes one double 9 inch crust pie or 2 tart shells)
2 cups all purpose flour
3/4 tsp salt
1 cup crisco shortening
1 large egg
2 tbsp cold water
1 tbsp white vinegar

For the ganache:
2 oz. bittersweet chocolate, finely chopped
¼ cup heavy cream
1 tbsp. unsalted butter, at room temperature

For the filling:
8 oz. cream cheese, softened
½ cup confectioners’ sugar, sifted
½ tsp. vanilla extract
2 tbsp. milk or cream

For topping:
Fresh strawberries, sliced (approximately 12 oz.)
Melted bittersweet or semisweet chocolate, for drizzling (optional)


Procedure:
1. To make the tart shell, combine flour and salt in a mixing bowl. Cut room temperature Crisco into flour with pastry blender or two knives until the mixture is uniform and the shortening resembles like peas. Beat egg, water and vinegar together to blend in a separate bowl. Pour all of the liquid evenly over the flour mixture. Stir with fork until mixture is moistened. Divide dough in and shape each into a ball approximately 4 inch or 10 cm. Wrap in plastic wrap and chill dough for 15 minutes for easier rolling.

2. Remove the dough from the refrigerator.  (If refrigerated for more than an hour, let stand at room temperature until malleable.)  Unwrap and roll the dough out on a lightly floured surface to a 13-inch round.  Transfer the dough to a 9-inch tart pan.  Mold the dough to the sides of the tart pan and remove the excess off the top.  Set the dough-lined tart pan on a large plate and freeze for 30 minutes.

3. Meanwhile, adjust an oven rack to middle position.  Preheat the oven to 375° F.  Set the dough-lined tart pan on a baking sheet, press a 12-inch square of foil into the frozen shell and over the edge, and fill with pie weights.  Bake for 30 minutes, rotating halfway through the baking time.  Remove from the oven and carefully remove the foil and weights.  Continue to bake until deep golden brown, 5-8 minutes longer.  Transfer to a wire rack to cool.

4. To make the ganache, place the chocolate in a heatproof bowl.  Bring the cream to a simmer in a small saucepan.  Remove from the heat and pour over the chocolate.  Let sit 1-2 minutes to melt the chocolate.  Whisk together until a smooth ganache forms.  If there are still bits of unmelted chocolate, microwave in 10 second intervals, whisking in between, until the ganache is completely smooth.  Whisk in the butter.  Spread the ganache in a thin even layer over the bottom of the cooled tart shell.  Allow the ganache to set before proceeding.

5. To make the filling, beat together the cream cheese and confectioners’ sugar in a bowl on medium-high speed until smooth.  Blend in the vanilla and milk or cream.  Spread the cream cheese mixture over the cooled ganache in the tart shell.

6. Starting from the outside and working toward the center, place the sliced strawberries in concentric circles slightly overlapping each other.  Gently press the berries into the cream cheese mixture to help keep them in place.  Drizzle with melted chocolate, if desired.  Chill until ready to serve.

Adapted from Annie's Eats and Zoey's baking book

Thoughts:
1. Delicious!!! I wish it is a bit sweeter... so maybe the top decorative chocolate should be semi-sweet chocolate and not bittersweet chocolate?
2. I tried it at room temperature, I have a good feeling that when it is cold it will taste even better :D

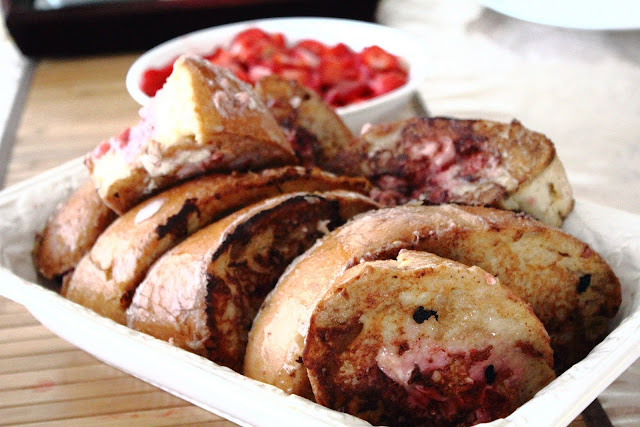
Strawberry Stuffed French Toast

Yum! Natasha, Zoey and I went to hand pick some strawberries in the outskirts of the city. It was one of those long lost summer days that brings me ample of memories of junior high days. A bit care free and a bit too much fun I would say, but totally worth the day off work.

Here are the pictures of our hand picked strawberries.


As soon as we got home, we washed a basket-full of these hand picked strawberries and ate them immediately. They were by far the most delicious strawberries I have ever tasted. Partly because they are so full of strawberry flavour and oooh sooo sweet. I often turn away from strawberries due to their sourness in the store-bought ones these days. But these are so worth the work to hand picked them. So what to do with our 5 pounds of strawberries? We looked up two amazinging mouth-watering recipes, a strawberry stuffed french toast and strawberry cream cheese tart, and the remaining of the day is spend baking these delicious goodies.

First up the strawberry stuffed french toast.


Ingredients:
Yield: 4 servings
Ingredients:
For the filling:
1 cup sliced fresh strawberries
2 tbsp. sugar
4 oz. cream cheese, softened
For the toast:
4 thick slices bread, such as challah or soft Italian bread
1 large egg
¾ cup milk
2 tbsp. melted butter
1 tsp. vanilla
¼ cup all-purpose flour
¼ tsp. ground cinnamon
¼ tsp. salt
Unsalted butter
Maple syrup, powdered sugar and additional fresh strawberries for serving


Procedure:
1. To make the filling, combine the sliced strawberries and sugar in a medium bowl.  Mix well and set aside to macerate for about 15 minutes.  Stir in the cream cheese until well blended.

2. To prepare the toast, carefully slice a pocket into the center of each slice of bread, taking care not to cut all the way through to the other side.  Heat a large skillet over medium heat.  In a shallow baking dish or pie plate, whisk together the egg and milk.  Whisk in the melted butter and vanilla.  Stir in the flour, cinnamon and salt and whisk until smooth.  Fill the pocket of each slice of bread with some of the filling mixture.  One or two at a time, place the filled slices of bread in the egg mixture, soaking about 30-40 seconds per side.  Remove the bread and allow the excess batter to drip off.  Transfer to a plate and repeat with the remaining bread slices.

3. Add 1 tablespoon of butter to the heated skillet and swirl to coat.  Add the filled slices of toast to the skillet in a single layer.  Cook until light golden brown and crisp, about 1-2 minutes per side.  Repeat with the remaining slices of bread, adding more butter to the skillet as needed.  Serve immediately with maple syrup, powdered sugar and fresh strawberries as desired.

Heavily Adapted from Annie's Eats

Thoughts:
1. These are soo delicious I have no complaints about them. The only thing I might change is the type of bread we used. I think it'll work well with thick slices of toast as well.
2. I'd watch for how long the cream cheese are cooked for. Because cream cheese turn a bit sour when heated, which is a turn off for me.

Lattice Apple Pie

Lattice Apple Pie

I love, love, love apple pie. I normally don't like anything that is too sour (with the only exception is the Chinese sweet n sour pork and apple pies). Other than these two, I can say I pretty much don't like anything sour. No lemon meringue pie, no sour skittles, no sour candy. It's a warm summer day and to celebrate our 3 year anniversary with my bf, instead of going out to have steak n lobster (which I love lobster), I all of a sudden really want to bake. The recipe was adapted from Annie's Eats. I trust her website so much, that every single item I followed her recipe turns out perfectly delicious. So with my lack of baking skills, I entrusted everything she says. And baked my very first apple pie. I'm actually pretty proud of making the crust without any fancy baking equipment. I made this pie with only bowls, spatulas, knives, and measuring spoons/cups. How'd it turn out? I loved it!!! I love how beautiful it looks!


Ingredients:

Pie Crust (One 9-inch. *Double the recipe for a double crust pie.) :
1¼ cups all-purpose flour
1 tbsp. sugar
¼ tsp. salt
8 tbsp. cold, unsalted butter, cut into small pieces
3 tbsp. very cold water

Filling:
4-5 medium/large Granny Smith apples (about 2½ lbs.), peeled, cored and sliced
1/3 cup granulated sugar
4 tbsp. brown sugar
1 tbsp. all-purpose flour
½ tsp. ground cinnamon
¼ tsp. grated nutmeg
1 tbsp. freshly squeezed lemon juice
2 tbsp. cold unsalted butter, cut into pieces
1 large egg beaten with 1 tablespoon cold water (for egg wash)


Procedure:
1. To make the pie crust, combine the flour, sugar and salt in a large bowl.  Mix briefly with a spatula to blend.  Add in the butter pieces and mix with spatula and use a knife to cut the butter into the flour until the mixture resembles coarse sand and the largest butter pieces are not much bigger than peas.  Mix in the cold water just until the dough comes together.

2. Shape the dough into a ball, wrap in plastic wrap and chill in the refrigerator for at least 30 minutes.  (This dough can be frozen for up to 2 months.)  

3. Remove from the refrigerator. The dough should have a marbled effect, where the the concentrated butter pieces will help with the flakiness. On a lightly floured surface, roll out half of the pie dough into approximately a 12-inch round.  I lift up my dough sheet and rotate it every few rolls or so to prevent it from sticking to the work surface. (Keep the other half of the pie dough chilled for now.)  Transfer the dough to a 9-inch pie plate, trimming the excess and crimping the edges.  Cover with plastic wrap and freeze for 30 minutes.

4. Meanwhile, preheat the oven to 400˚ F.  Position an oven rack in the upper-middle position.  In a large mixing bowl, combine the sliced apples, sugars, flour, spices and lemon juice.  Toss well to combine.  When the bottom crust is finished chilling, pour the apple mixture and accumulated juices into the bottom pie crust and use a spatula to even the top out slightly.  Dot the surface of the apples with the pieces of cold butter.  Roll out the remaining pie dough on a floured work surface.  Make a lattice top crust as shown in the link. Brush the top and edges of the crust with the egg wash. This is important!  You want a lovely golden pie crust, trust me.

5. Place a baking sheet on the lower oven rack.  Place the pie on the upper rack and bake until the crust is golden brown and the juices are bubbling, about 50-60 minutes.  Transfer to a wire rack and allow to cool for at least 30 minutes before slicing.  Serve warm or at room temperature with your favourite vanilla ice cream.


 Adapted from Annie's Eats

Thoughts:
1. I prefer my apples to be a bit softer, the granny smith are still very crunchy. I should look for other cooking apples.
2. Maybe the granny smith apples are more sour, I find this recipe a bit on the sour side. But perfect with ice cream.
3. The amount of dough made was perfect. Too much apples this time. Next time 4 medium ones are good.