Thursday, March 7, 2013

Paillard


Paillard
1097 Rue Saint-Jean
Quebec City, QC G1R 1S3 
http://www.paillard.ca/

Paillard is a cafe, bakery, sandwich/soup, lunch, take-out, patisserie all-in-one.  It is conveniently located in the heart of Old Quebec, walking distance to major attractions and hotels.  The place is fairly large and packed with locals.  A great place to stop for lunch, especially we find that Quebec's restaurants tend to be on the higher end of things.

From our googling, we were going to go to Le Croquembouche for patisserie.  But Le Croquembouche is very far away from Old Quebec, and we would need to take the car out to drive there.  So while we were just walking around Old Quebec, we saw Paillard and lots of people inside, meaning it's a great place to try.  At first I was skeptical with it being a touristy location, but it turns out it is packed with locals with families and kids enjoying lunch there.  Since we already had lunch that day, we decided to get some take-outs.  We bought an almond and chocolate croissant for next day's breakfast.  And we also bought two mini cakes and macarons to share with the Campbell family when we arrive at Montreal. 

Almond croissant ($2.95) - voted the best croissant in Quebec 2010.  Loved that it has a sweet creamy filling inside, not many places do that.


Chocolatine ($2.95 ish) - super flaky and yummy
First off, I absolutely enjoyed the croissants very much.  For once I enjoyed the almond croissant more than the chocolate one!! Surprise surprise.  This is because Paillard's almond croissant has a sweet almond paste filling inside the almond croissant, which prior to this I have found it really rare to have.  It went perfectly with the Starbucks coffee from the hotel.

Don't remember the name =( ($3.95 ish) Dark chocolate mousse with blackberry flavours - delicious!

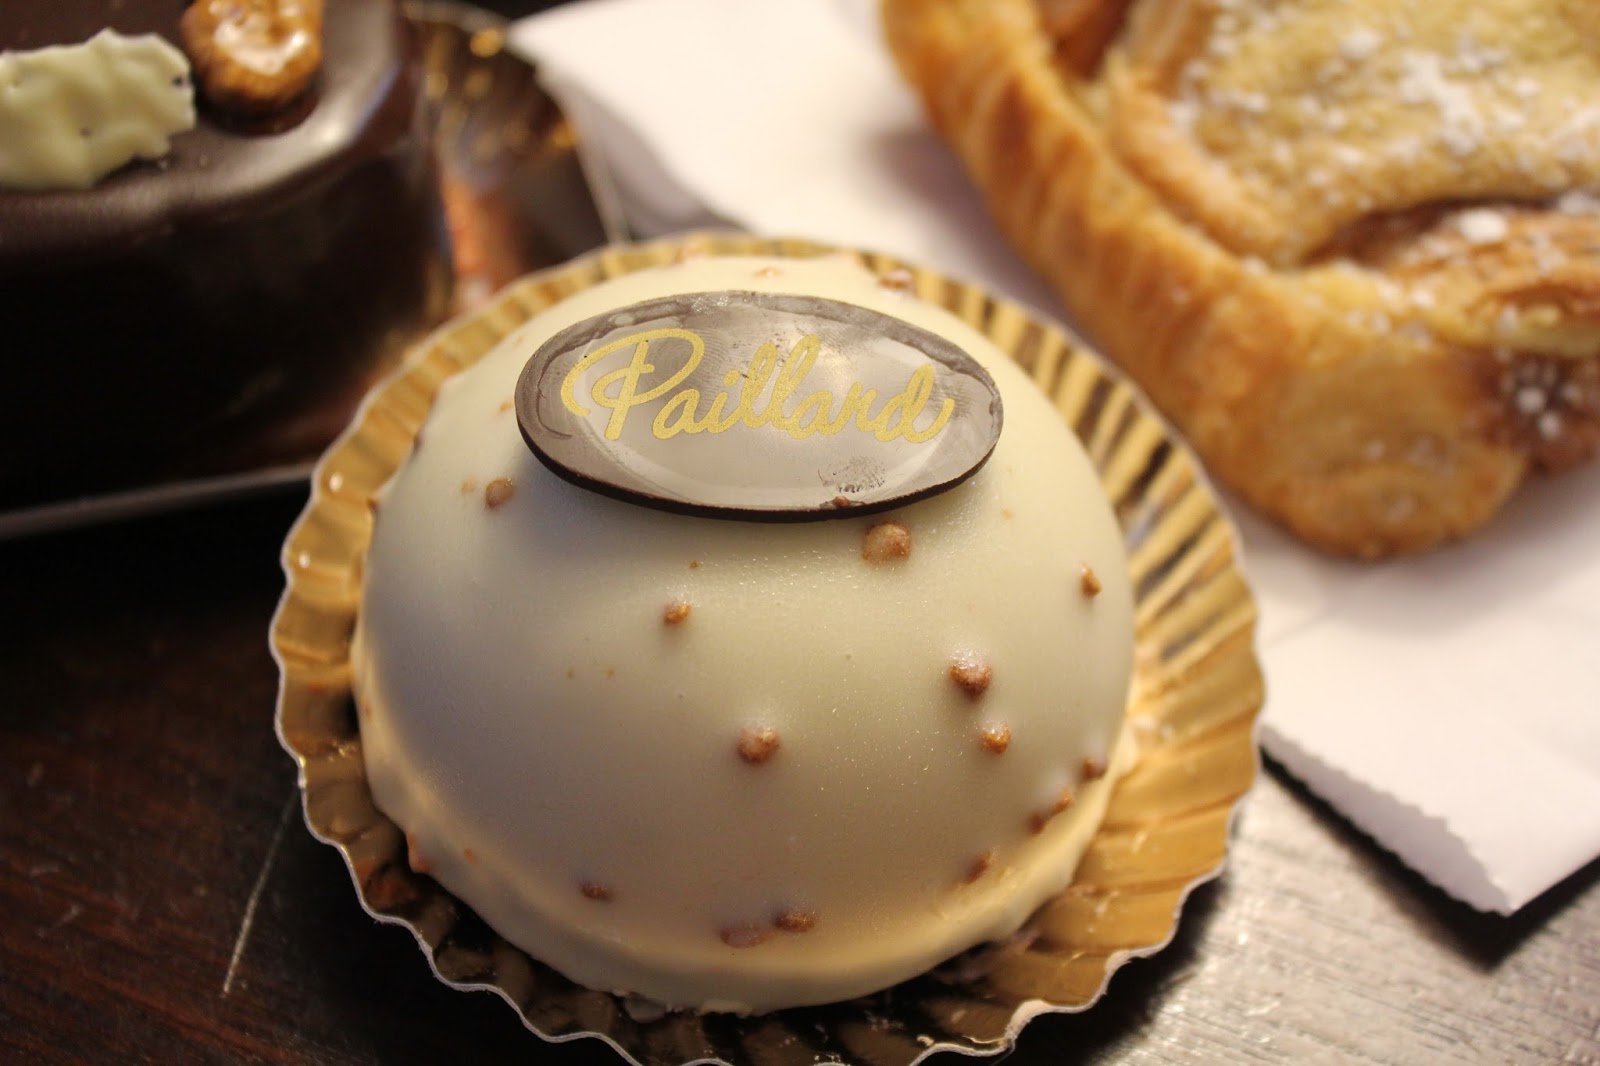
Bombe marron au caramel fondant ($3.95) chestnut mousse with a white chocolate cover - a bit too sweet for me

Box of assorted macarons ($1.55 each) - there's lemon, chocolate, salted caramel, passionfruit, strawberry, pistachio, vanilla, and coffee.
The remaining desserts were enjoyed with the Campbell family.  When Roxie first saw us unwrapping the desserts, she immediately went and hold the box of colorful macarons.  I guess this is her first time seeing such cute colourful little cookies.  I didn't try all the flavours, so I couldn't tell you how they all tasted.  I tried chocolate and vanilla.  They were very nice and crisp, and moist with chocolate ganaches.  The flavours weren't as strong as the Montreal's La Maison du Chocolate ($2 something each?), but for the price I think Paillard is mighty amazing too! I'm very happy Stepehen, Avery, and Roxie enjoyed them very well for their first time.  We liked it so much, we went to buy all the ingredients the next day to make chocolate macarons  with Stephen's new stand mixer.

Then we tried the two cakes while watching a movie.  I enjoyed the dark chocolate cake more.  The other one was bought because during the trip I learned that "marron" means "chestnut". and decided to try anything chestnut.  The chestnut one taste a bit like the Chinese chestnut angel cake but sweeter.

I enjoyed Paillard very much, found it super affordable and casual but with great quality!  Can't wait to try their made-to-order sandwich station with fresh baked breads and soups next time.

Le cochon dingue


Le cochon dingue
46, boulevard Champlain
Québec (Québec) G1K 4H5

http://www.cochondingue.com/en/home.html?lang=EN

Le cochon dingue, literally means crazy pig, is located in the Petit Champlain district also.  With the look and feel of a real French bistro, its friendly atmosphere and its ultra tasty menu with a European flair, it quickly become the go-to-place for breakfast.  We actually came to this restaurant twice.  Once for breakfast, and because we like it so much, again for lunch before we leave Quebec City.

Breakfast:

Their website claims they "serve the best coffee, old-fashion hot chocolate made with Belgian chocolate, your choice of toast, with homemade raspberry-strawberry jam or apple butter with a sincere morning smile"  And I totally agree with that line! Keep in mind, everything on their breakfast menu includes a cup of expresso, or a bowl of cafe au lait (French word for latte), or a pot of old fashioned hot chocolate. Sweet deal!

Bowl of cafe au lait and old fashioned hot chocolate
I ordered a 2 eggs benedict with ham and poached egg on toasted English muffin and Hollandaise sauce.  The meal is also served with homefries, choice of toast, I picked raspberry-strawberry jam, and comes with a mango yogurt to finish it off ($14.50).  And this price includes my old-fashioned hot chocolate.


Charles ordered a sunny side up fried egg with sauteed mushrooms, bacon, onions, and béchamel  sauce. Also served with home fries, choice of toaste, he picked apple butter, and also has the mango yogurt.  ($12.95) and this includes the giant bowl of cafe au lait (or latte). Note béchamel sauce is a classic white sauce made from butter, flour, and milk; it is a classic base for many sauces.


Lunch:

Because breakfast was so amazing, we came for lunch before leaving Quebec City.

I ordered a set lunch from the daily menu (it changes). It is a pulled duck linguine pasta, it comes with a soup or salad, and coffee or tea ($11.95).  A very good deal I think.  I chose soup, and that day's daily soup is cream of broccoli.  I enjoyed the pasta very much.  It is different than my usual Italian style of pasta.  It is more stir fry in olive oil and lots of herbs and duck.  Very interesting and delicious.

Cream of Broccoli 

Pulled duck Linguine
 Charles ordered the famous Cochon Dingue Seafood Pot Pie ($21.95), it has lobster, crab, shrimps, scallops, salmon, diced potatoes in a creamy sauce and served with a salad. We shared both dishes, and there are at least 2-3 pieces of each item listed so that we both can try each thing. Amazing good. Crispy pastry is pretty awesome too.  Wish I had room to order dessert before we head out =(
Seafood Pot Pie
Overall impression is very very good. A classic European bistro.  Great for casual dining without sacrificing food quality or price! Serving daily fresh food done well! Also has unlimited bread upon request.

P.S. a night view of the restaurant, so prettty!
Restaurant at night


Wednesday, March 6, 2013

Le Lapin Sauté


Le Lapin Sauté
52 Rue du Petit Champlain  
Quebec City, QC G1K 4H4
(418) 692-5325

http://www.lapinsaute.com/english/home/

With the recommendations of coworkers growing up in Quebec, we have picked Le Lapin to celebrate this year's Valentine's day and our 'first' romantic dinner during our trip to Quebec City.  Le Lapin is located in Quebec's Petit-Champlain district, a picture-perfect neighbourhood resembling a quaint riverside village with a romantic European atmosphere.  One of the most visited neighbourhood of Quebec! 


Walking in Le Lapin, we were immediately greeted.  The restaurant has a country-in-the-city feel... a warm, quaint and cozy inns from the early 20th century.  Perfect for romantic getaway!  We were seated by the fireplace on a cold winter night.  And ordered a glass of cider (alcoholic version) to warm ourselves up.  I enjoyed the glass of cider very much, it is sweet and sour like apple juice and you can barely taste the alcohol in it. 


A glass of cider in pretty pink
As the restaurant name suggests, Le Lapin's specialty is rabbit.  Then after looking at the menu, we decide to go with the Rabbit and Duck for Two (Tout lapin tout canard) to taste the menu. To my knowledge, this is probably the first time I have real French cuisine!

After ordering, the waiter gave us some in-house appetizer to start.  It is French bread baked daily served with some spread.   The spread is crumbly, dark, and tasty!  I have no idea what it is made of, but it is absolutely delicious.  I wish I remember what the name of the spread to tell you more about it.
Appetizer French bread with spread

The rabbit and duck for two menu includes rabbit leg confit, homemade rabbit "rillettes", rabbit sausage, duck leg confit, duck foie gras, and smoked duck breast served with carrots and onions confit, "La Sauvagine" cheese, nuts bread with nuts, rustic bread, beets and apples salad, mustards and pickles ($62.95).


Rabbit and Duck for Two

This is my first time eating rabbit and smoked duck breast. Let me describe each item...

Rabbit leg confit (top right) - confit describes the traditional way of preserving meat usually with goose or duck leg.  The meat is salted and seasoned with herbs, slow cooked, cooled, and stored in its fat.  Rabbit meat taste like chicken but with a hint of game meat taste (like lamb).  The leg is a bit on the dry side for my liking, but I think it is because rabbit meat itself is very lean.

Homemade rabbit "rillettes" (sphere shaped on the bottom left) - rillettes is a preparation of meat similar to pâté, where the meat is cut, salted, cooked slowly, shredded, cooled to form a paste for spread.  I really like the taste of the rillettes, it is tender and moist, and flavourful. 

Rabbit sausage (top right underneath the rabbit leg) - very delicious.  I don't have much to describe it, besides it taste like a sausage and it tasted good. 

Duck leg confit (bottom right) - similar to the preparation to the rabbit leg, but I like the duck leg confit much better.  It is juicy, tender, and flavourful.  The duck fat really helps! I have lots of BBQ duck as a Chinese, but this is my first time eating duck the French way.  Very good!

Duck foie gras (disk shaped on the left) - or duck liver. By French law, foie gras is the liver of a duck fattened by force feeding of corn and gavage.  I do enjoy the texture of liver pâté so I liked it.  It is rich, buttery, and delicate.  Although I find it pretty filling after a few bites.  The whole disk is a bit too much to eat, if you don't like liver.

Smoked duck breast (pink meat in the middle) - duck breast that has been slow smoked and thinly sliced.  Taste a lot like smoked salmon but a bit chewier.  I was so surprised by this.  Never heard of smoked duck breast before.  It is very tasty if you like smoked salmon.

Carrots and onion confit (bottom left) - cold salad of carrots and onion and it is sweet.

"La Sauvagine" cheese (top left) - honestly, I still don't appreciate cheese that much.  This cheese is rich and too flavourful for me.  So I can't comment too much on it.

Nuts bread with nuts (bottom right) - love, love, love this bread!! SO MUCH! I wish I can bake my own bread to make it.  Full of walnuts, almond, and other nuts... soft and warm... yummy!

Rustic bread - also baked freshly daily. Not as special, but it is yummy.  Bread is unlimited, you can ask for more to go with your meal if you would like.

Beets and apple salad (middle) - Amazing salad! Sweet and tangy and refreshing with the rest of the meal.

Mustard and pickles - I actually didn't eat the mustard at all. So no comment.  I did eat a lot of the pickles.  I am no expert in pickles though.  I found the pickles really help with the fattiness of the meal though. Palette cleansing.

Maple syrup crème brûlée
And to finish off with a delicious meal, we ordered their INFAMOUS, world renowned, Oh-you-will-die-from-eating-this... Maple syrup crème brûlée ($7.25) with some coffee. 

I have crème brûlée from a few places before, but I was never impressed with it.  I found most places have the hard caramel too thick.  If I eat it, I would finish eating the custard part so fast, but the caramel takes a long time to melt in my mouth.  This maple syrup crème brûlée... oh-it-is-different-and-special!  The caramel layer is PAPER thin!  When you first put in your mouth, you can taste the sweet maple flavour custard... within seconds the ultra thin caramel begins to melt and adds a hint of sugary-ness.  It is A-M-A-Z-I-N-G!!! Definitely the BEST BEST BEST crème brûlée I have E-V-E-R tried.  I don't know how to emphasize this anymore!  The portion is big too.  Argh so good!

Overall impression of Le Lapin is very good. Great atmosphere, romantic, and reasonable prices.  This made me fall in love with French cuisine.  Wish I discovered it earlier =)

Tuesday, March 5, 2013

Casse Crêpe Breton


Casse Crêpe Breton
1136 Rue St-Jean
Quebec, QC G1R 2L3
http://cassecrepebreton.com/


A cute little bistro serving made-to-order crepes in Old Quebec (Veux Quebec).  On Rue St Jean you can find many shops, restaurants, and bars.  Everything seemed pretty pricy to us.  And we are so happy to find this place so that we can try some French crepes on a nice budget! First off is that they don't have a huge selection making decision a bit easier.  We ordered a breakfast crepe with ham, egg, mozzarella and mushrrom.  The crepe is so crisp and thin that I find it very difficult to eat with forks and knives.  The second crepe we have we customized it to include turkey, green peppers, and mozzarella.  And then we finished off with a dessert crepe with chestnut filling and ice cream.  It is difficult to find chestnut filling in many places, it is so cool they have it.  Love the dessert crepe!

Ham, egg, mozzarella, and mushroom ($7.75)

turkey, green pepper, and mozzarella ($7.25)

Chestnut Crepe with ice cream ($4.75 + $1.25)

Another angle of the chestnut crepe with ice cream


Sukhothai

52 Wellington St E
Toronto, ON M5E 1C9


Gaeng Panag: Panang curry with kaffir lime leaves, basil leaves, red and green pepers and coconut milk. Choice of chicken, beef or tofu and served with rice.  Richer than the others and more about the meat.

Sukothai Pad Thai: Our “Sukh’ed up”, Northern Thai version of the Pad Thai is a must to try.  You will find a slightly different take on Pad Thai depending on where you are in Thailand.  This is a taste of our Chef’s hometown goodness.  Extras:  made with peanuts, more herbs and a small-town, northern-style, authentic-Thai twist.


Nua Gra Teaum: Stir Fried, garlic beef served with fried egg, cucumbers and rice.  A taste of Thailand street food.

Sunday, February 10, 2013

Salted Caramel Macaron


My journey with macarons actually wasn't a long one.  Although my friends probably thought so otherwise.  I first heard about these little cookies from my cousin Vincci's pictures on Facebook 2 years ago.  Then I started searching where I can buy these little cookies, and came across a local bakery - Duchess Bake Shop - to try with Natasha.  Then it all started from there... buying macarons whenever and wherever I see them.  After trying a few places across Canada (Edmonton, Calgary, Vancouver, Montreal, and Toronto), I have found my favourite macaron place - La Maison du Macaron in Montreal!

Since my love for macarons has grown, I have always wanted to try to make them.  The idea quickly vanished as I learned the number of equipment and tools I need and the sheer multi-step processes seem daunting.  Until now... with Justin successfully attempted it, Freddy has a Kitchen Aid stand mixer, and Haley wants to attempt this challenge with me did I seriously start researching how to make macarons!  The first batch of green tea macarons, the shell mixture were too thick so the appearance doesn't look appealing but taste awesome.  The second batch of chocolate macarons, the shell mixture was too runny and the shells has many air holes from incorporating too much meringue. 

Salted caramel is a classic flavour.  The key ingredient here is fleur de sel (flower of salt in French), a type of salt collected from the coast of Brittany. What makes fleur de sel different from normal table salt is that only the top layer of the salt bed is used, and so the salt remains as flakes and retains more minerals and a full, sea salt flavour.  And fleur de sel is usually hand harvested, making it more expensive than commercially harvested salt.  But, what it does to this caramel, is it gives it bursts of saltiness, which brings out the sweetness and flavour of the caramel much more.

So here it is... the successful batch of salted caramel macaron (I'd say third try is not bad, despite being a bit too salty since we didn't use fleur de sel hehe)

See my previous post on my research and notes =) to guarantee your macaron success too!


Salted Caramel Macaron

Makes 50-60 macarons

SALTED CARAMEL FILLING

Ingredients
250g fresh cream (33% heavy whipping cream)
350g granulated sugar
5g fleur de sel (used normal sea salt =P --> TOO SALTY should be a pinch or to taste!!!!!)
350g unsalted butter
  

CHOCOLATE MACARON SHELL

Ingredients Part 1
600g sifted Tant Pour Tant (300g almond meal with 300g icing sugar)
120g aged egg whites (about 3 eggs)
10g of cocoa powder

Ingredients Part 2
300g granulated sugar
75g water
120g aged egg whites (about 3 eggs)


Procedure:


***Age your egg whites:  12-24hr before making your macarons, split egg whites from egg yolks and store in fridge.  Bring egg whites to room temperature before starting (about 3-4 hours).***


Step 1. MAKING YOUR FILLING:

1. Chop your unsalted butter into small cubes

chopped butter pieces

2. Weigh 250g heavy cream into a small saucepan and bring to boil, remove from heat as soon as it starts to boil.

3. Weigh 350g sugar into a medium saucepan.  Melt your sugar at medium-high heat, stirring frequently to ensure that it caramelizes evenly.  When the sugar reaches a dark brown consistency remove from the heat and slowly pour in the hot cream whilst continuing to mix with a spatula.  (Be careful when pouring... the caramel will form huge bubbles that can overflow from the saucepan).

Dark brown caramel before adding cream

4. Let the caramel cool to around 45°C and then add salt and  a few pieces of butter at a time while mixing the caramel.

5. Pour the caramel into a shallow container.  Cover the surface of the caramel with cling film to prevent a skin from forming and chill in the refrigerator until needed.


Step 2. MAKING YOUR MERINGUE SHELLS:

1. Sift the 300g of almond meal and 300g of icing sugar together.  Add 10g of cocoa powder.  Make a 'hole' in the middle of the dry ingredients and pour in 120g of egg whites.  Mix the TPT with the egg whites, mixing vigorously with a spatula until you have a smooth paste.

Smooth paste consistency
2. Add 300g of caster sugar, 75g water to a saucepan and commence cooking. Stirring occasionally to help with the sugar melting. 

Measuring sugar temperature. It is imperative to make the meringue at the correct temperature!
3. Place the room temperature aged egg whites in the Kitchen Aid mixer with the whisk attachment.

4.  Once the sugar has reached 115°C, start whipping your egg whites until they reach ‘soft peak’ consistency (speed 4).
 ('soft peak' - the egg whites should be 'light' and 'foamy' and lightly sticks to the whisk attachment)

5. When the sugar reaches 118°C, remove from the stove and pour slowly on the still mixing egg whites.

6. Turn the speed to maximum (speed 10) for around 2 min and return to medium (speed 4) for another 2 min and then let the meringue cool to around 50°C whilst mixing slowly (speed 2) or until a 'stiff peak' forms.
 ('stiff peak' - the meringue mixture is shiny and glossy and sticks to the whisk attachment without falling back to the bowl. If it is not shiny, the mixture is over-beat)

Stiff peak consistency of the Italian meringue
7. Using a spatula, fold the meringue into the TPT and egg white batter a little at a time. Work the mixture gently from the sides to the middle until you reach a homogenous, shiny texture.  The consistency should be similar to a smooth cake batter.  You may not have to use all the meringue.

(This part is difficult to describe... but if the mixture is correct consistency... the mixture should fold over on itself and incorporate back into the rest of the mixture. It should do this in 12 seconds but I think knowing the right consistency comes with experience... and after piping the mixture will round and smooth itself out and have no peaks forming.)

Folding the meringue into the paste


Step 3. PIPING AND BAKING YOUR MACARON SHELLS:

1. Position the wire rack at the middle of the oven and preheat the oven to 350°F.

2. Place size template (1.5 inch diameter circles spaced 1.5 inch apart) on baking sheet, and cover with parchment paper.  Using a plastic piping bag with a plain round tip (or use a zip-lock bag), pipe the shells onto a parchment paper covered baking sheet according to the size template.

(When piping, press the mixture at the center and let the filling fill the circle. Do not draw circles with the filling. You should stop piping before the mix reaches the outside edge of the template.)

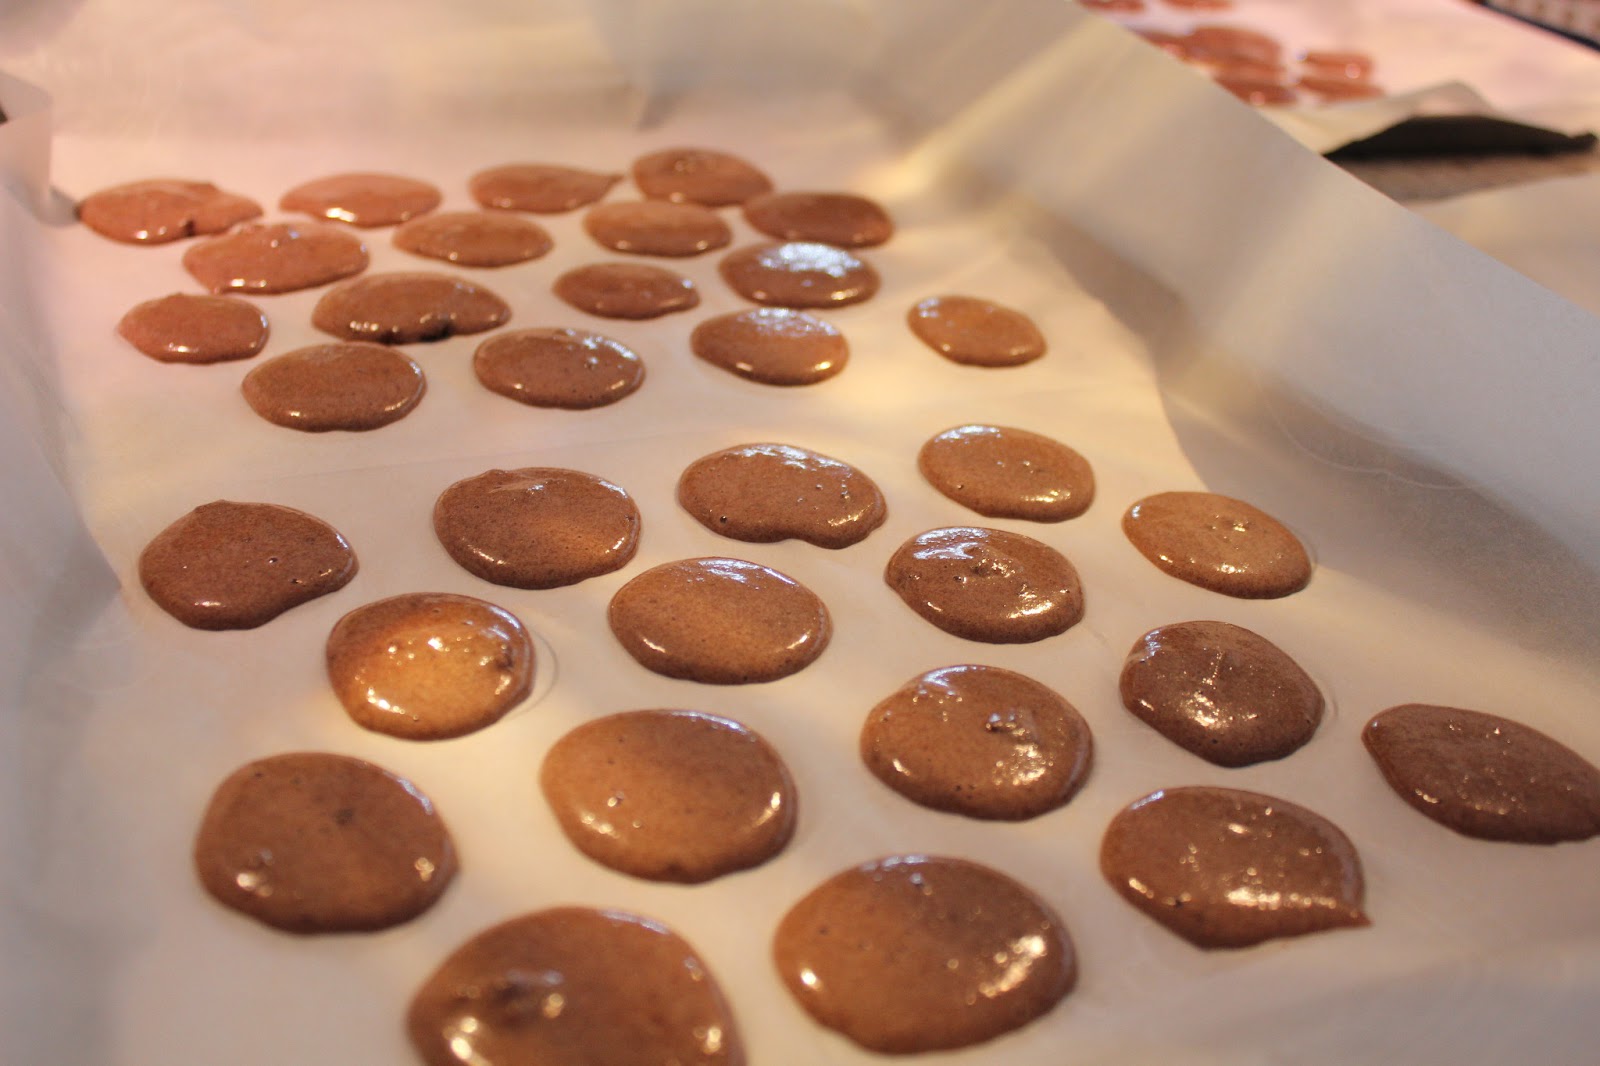
3. Leave the macaron shells outside at room temperature for 15 min or until they have formed a skin and are dry to touch. Remove the template from beneath you baking sheet.

Letting the macaron shell rests before baking
4. Place the macaron shells on the middle rack inside the preheated oven.  Turn the temperature to 300°F.  Bake for ~10 minutes.  Then prop the oven door open with a wooden spatula or chopsticks, and bake for another ~5 minutes. 

(Another important tip I learned was to leave the oven door slightly ajar for steam to escape.  The right amount of steam needs to be released from the oven because too much steam will result in soggy meringues, and too little will mean that the meringues may not rise.  The macaon shells are done if the color of the macaron becomes lighter, and you cannot see dark batches of the ingredients from the top. A smooth round top, feet forming, and risen macaron shells = good looking macaron!)

5. Once baked, slide the paper off the tray and let the shells cool (preferably on a wire rack).

(The macarons should be easy to peel off from the parchment paper if baked properly)


Macaron shells after baking... smooth round surface, feet formed, and risen cookie

Step 4. ASSEMBLING YOUR MACARONS

1. Pull the shells from the paper gently and turn them upside down. Pair your Macaron shells according to size and lay them out on your bench.

Pairing macaron shells by size
2. [[didn't do this part because the caramel filling was too salty! Don't use normal sea salt! Or use very little to taste!!  But the filling consistency is perfect!]] Take your caramel out of the fridge and transfer it to a mixing bowl. Place the caramel over a bain marie to soften the mixture and melt any pieces of granulated butter (take care not to melt the mix too much). Remove from the heat and whisk the caramel energetically. This will thicken the mix to a butter cream consistency (perfect for piping).

Chilled salted caramel
3. Fill one half of your paired macaron shells filling them generously but keeping a space of approximately 3mm from the edge of the shell.

4. Pick up the macaron filled with caramel in one hand and the empty pair in the other and close the macaron by gently twisting the two shells together from left to right. Remember to let the filling spread regularly all the way to the edge of the shells.

Step 5. STORING AND SERVING

1. Put the finished macarons on a tray and leave them in the fridge for a least 24 hours.  (I only left it at room temperature for a day)

2. Prior to serving, let the macarons return to room temperature.


Recipe adapted from Honey and Soy


Notes:

1.  Didn't use the proper fleur de sel, so the filling was TOO SALTY! but I think it's ok, if next time to use a pinch of normal salt or to taste .

2.  The shells turned out perfect this time!  Key differences are: did sift the almond meal and icing sugar together, finally got the consistency of the final mixture right, and figured out the perfect way to bake them.

3. Make sure to make the filling before the shells! The first two times didn't let the filling to cool long enough so it wasn't thick enough to be sandwich between the shells.

4. For some unknown reason, the macarons made the day-of taste too sweet.  But if you let it rest for a day (I just left it room temperature for a day) before serving, the flavours really do develop, becomes chewier and tastes perfect!

Sunday, January 27, 2013

Chocolate Macaron

Chocolate Macarons with Espresso Ganache Filling
Makes 50-60 macarons

Ingredients:

For the macarons:
300 g almond meal
300 g icing sugar
10 g cocoa powder (Dutch-process preferred)
120 g aged egg whites (from about 3 eggs)

120 g aged egg whites (from about 3 eggs)
300 g granulated sugar
75 g water

For the Nutella filling:
¾ cup (12 tbsp.) unsalted butter, at room temperature
6 tbsp. Nutella
¾ cup confectioners’ sugar, sifted
Pinch of coarse salt

Procedure:

The same as the green tea ones.

[[This time incorporated all the meringue and make the mixture too thin, and so the piped mixture spreads too much and the macaron shells forms many air holes in them.  The macaron shells did not rise nor does it have feet formed]]


Adapted from Annie's Eats and Honey and Soy

Notes:

1. The macaron shells taste good.  The ones with a lot of bubbles hardens and does not have the chewier texture however.  So only a small portion of this batch was tasty.

Saturday, January 26, 2013

Green Tea and White Chocolate Ganache Macaron

Green Tea Macaron with Nutella Filling

Green Tea and White Chocolate Ganache Macarons

GREEN TEA AND WHITE CHOCOLATE GANACHE FILLING

Ingredients
400g Fresh Cream (33% Heavy Cream)
400g Baker's white chocolate
150g unsalted butter
20g matcha powder (Ten Ren's from Haley)

GREEN TEA MACARON SHELL

Ingredients Part 1
600g sifted Tant Pour Tant (300g almond meal with 300g icing sugar)
10g matcha powder
120g aged egg whites (about 3 large eggs)

Ingredients Part 2
300g granulated sugar
75g water
120g aged egg whites (about 3 large eggs)


***Age your egg whites: 12-24hr prior to making macarons, separate your egg whites from egg yolks and store in the fridge.  Bring the egg whites to room temperature before starting to make macarons***

Step 1. MAKING YOUR FILLING:  

[[failed this part - make the filling after the shells and the filling was too runny]]

1. Chop 400g of white chocolate to a very fine (grated) consistency.

2. Chop 150g of unsalted butter into small cubes.

3. Start heating 400g of heavy cream on medium-high heat.  When cream starts to boil, remove from heat.

4. Pour ¾ of the boiled cream into the grated chocolate and let sit for a few minutes to melt the chocolate. Mix with a spatula in a slow circular motion taking care not to incorporate any air.

5. Once you have a shiny and homogenous mixture, pour the remaining cream over the chocolate and repeat the mixing process. Check the temperature of the chocolate (not more than 55°C).

6. Add the butter piece by piece and mix until the butter has completely absorbed into the chocolate.

7. Cover your ganache with clingfilm and leave in the fridge to set.

Step 2. MAKING YOUR MERINGUE SHELLS:

1. Sift 10g of matcha powder with 300g of almond meal and 300g of icing sugar together to remove clumps.

2. Make a hole with the TPT dry ingredients and add 120g of aged egg whites, mixing vigorously until you have a smooth paste.  

[[didn't mix until it become a paste, so there's a lot of dry ingredients around when meringue is folding with the mixture]]

3. Add 300g of granulated sugar, 75g of water to a saucepan and melt the sugar on medium-high heat, stirring occassionally.

4. Place the aged room temperature 120g egg whites in a Kitchen Aid mixer with the whisk attachment.

5. Once the sugar has reached 115°C, start whipping your egg whites at medium speed (speed 4) until they reach ‘soft peak’ consistency.

6. When the sugar reaches 118°C, remove from the stove and pour slowly on the still mixing egg whites.

7. Turn the speed to maximum (speed 10) for around 2 min and return to medium (speed 4) for another 2 min and then let the meringue cool to around 50°C while mixing slowly until reaches a stiff peak.

8. Using a spatula, fold the Italian meringue into the TPT/egg white paste. Work the mix gently from the sides to the middle until you reach a homogenous, shiny texture.

[[the mixture was too thick! because there's a lot of dry ingredients around the bowl or there's not enough meringues?]] 

The mixture is too thick... it was difficult to pipe and the mixture didn't incorporate back to itself

Step 3. PIPING AND BAKING YOUR MACARON SHELLS:

1. Preheat oven to 350oF.  Place the size template (1.3inch diameter circles spaced 1 inch apart) on the baking sheet and cover with parchment paper.

[[the size template is a bit too small and too close together... 1.5 inch diameter circle space 1.5 inch apart is better]]

2. Using a plastic piping bag with a plain 1-inch tip, pipe the shells onto a baking sheet according to the size template.
You should stop piping before the mix reaches the outside edge of the template.

3. Tap the tray gently on the side of the bench until the macaron reaches the size of the template.

4. Remove the template from beneath your baking sheet.
Leave the macarons outside at room temperature for 15 min or until they have formed a skin and are dry to touch.

5. Bake the macarons at 350oF for 9-15 minutes.
Once baked, slide the paper off the tray and let the shells cool (preferably on a wire rack)

Because the mixture is too thick, the macarons have peaks on the shells... the top is not smooth... but feet has formed!

Step 4. ASSEMBLING YOUR MACARONS

1. Pull the shells from the paper gently and turn them upside down.

2. Pair your macaron shells according to size and lay them out on your bench.

[[ filled with nutella instead =) ]]

3. Put your green tea ganache into a piping bag.

4. Fill one half of your paired macaron shells filling them generously but keeping a space of approximately 3mm from the edge of the shell.

5. Pick up the macaron filled with ganache in one hand and the empty pair in the other and close the macaron by gently twisting the two shells together from left to right.
Remember to let the filling spread regularly all the way to the edge of the shells.

Step 5. STORING AND SERVING

1. Put the finished macarons on a tray and leave them in the fridge for at least 24 hours.  Prior to serving, let the macarons return to room temperature.


Adapted from Honey and Soy


Notes:

1.  Need to make the TPT-egg whites mixture a paste before incorporating the Italian meringue.  The final paste is too thick for piping... Need more meringue?

2.  Need to make the filling before the macaron shells to allow enough time for the filling to cool and thickens for piping.

3.  Despite the macaron shells doesn't look appealing, the green tea flavour is amazing! And the macaron shells are chewy and delicious.  So I don't think it is a failure =)

How to Make Macarons - a compilation of research!


French macarons are a small cookie with a big reputation.  A reputation for being beautiful and delectable, and also a reputation for being incredibly temperamental and finicky to make. 


1.  What is the Perfect Macaron?

The perfect macaron is crisp on the outside, chewy and tender on the inside, and ends with a lush filling.

The macaron shell should
  •  be flat, perfectly round, and shiny gloss on the outer skin
  •  be chewy
  •  have 'feet' or 'skirt' that goes around the circumference of the shell
  •  have a generous, rich filling that comes right to the edge and have a rounded effect

2.  What is the technique that ensure perfect macaron for every batch?

Using the Italian meringue

The French meringue is best known to home cooks where fine white sugar are added to the beating egg whites.

The Swiss meringue is whisked over a double water bath to warm the egg whites, and then whisked steadily until it cools. This forms a dense, glossy marshmallow-like meringue. It is usually then baked.

The Italian meringue is made with mixing boiling sugar syrup into the 'soft peaked' egg whites while they are being whipped, until a 'stiff peak' is achieved.  This method leads to a more 'stable' soft meringue that will not collapse or deflate.  It also gives a lot of 'rising' power to the mixture.  Many sources says they prefer the Italian meringue method because 1) it gives consistency, 2) mixture allows flexibility in its consistency, 3) more convenient - less time in aging egg whites and less wait before baking, easier to peel from the baking sheet.  


3.  What Equipments are Needed for the Perfect Macaron?

It is absolutely essential to have the right tools to make successful macarons.  There's a saying that "baking is a science", because making macarons requires the precision and attention to detail of a good scientist.  And a good scientist will use the right tools to ensure the precision and accuracy of their experiments.

These are the tools/equipments you will need:
  •  Electric stand mixer
    An electric stand mixer is essential to making an Italian meringue because it allows your hands to be free to pour the sugar syrup at the right temperature into the mixing egg whites at the correct consistency.
  •  Sugar Thermometer
    It is imperative to have a sugar thermometer to measure the sugar temperature of the sugar syrup at exactly 118oC (244oF) the magic numbers for the Italian meringue.
  •  Kitchen Scale
    Since making macaron requires precise measurements, a kitchen scale is essential to measure out all your ingredients with exactness.
  •  Piping bags and piping tips, spatula
    You will need piping bags to pipe both the macaron shells and filling with carefulness to ensure a 'round' macaron is produced.  You may get disposable bags or reusable ones.  The piping tip needed is a plain round 1/2 inch diameter tip.


4.  Making the Macaron Shell

 There are 5 steps to making the macaron shells:
  •  Making the tant-pour-tant (TPT)
  •  Making the Italian meringue
  •  Combining the TPT and meringue (verb: macaronner)
  •  Piping the shells
  •  Baking the shells

  • Making the TPT
 Tant-pour-tant roughly translates as "as much as", meaning that we are using equal amounts of almond meal and pure icing sugar.

A very important note about your egg whites: they must be aged.  This means separating the egg yolks from egg whites, and storing the whites in the fridge for at least 12-24 hours (up to 5 days) before you make your macarons.  This reduces the elasticity of the egg whites and is what will contribute to the beautiful 'feet' or 'skirt'.  Must return the egg whites to room temperature before using them. 

Ingredients:
150g almond meal
150g icing sugar
60g egg whites

Measure out the almond meal and icing sugar separately on a kitchen scale. Sift the almond meal and icing sugar together with a sieve into a large bowl.  It is important to sift them together and not one after the other.

Using a whisk, make a well in the TPT, and pour the egg whites into the well.  Using brisk circular movements, incorporate the TPT and egg whites to form a smooth, thick paste.


  • Making the Italian meringue
Italian meringue uses cooked sugar.  Here is where the precision is of the utmost importance.  Ensure that your sugar syrup is heated exactly between 116oC and 118oC by using a sugar thermometer before the heated sugar is added to whipped egg whites.

Ingredients:
60g egg whites
sugar syrup:
150g fine white sugar
35g water

Place the aged, room temperature egg whites into the bowl of the electric stand mixer.

Weigh the water into a saucepan, then add the sugar.  Heat the sugar syrup on medium-high heat.  When the syrup reaches 115oC, turn on the electric mixer and start whipping the egg whites on medium speed until it reaches the soft-peak stage.  The trick is getting the timing right to ensure that your egg whites are at the soft peak stage as soon as your sugar syrup is ready. 

As soon as the sugar reaches 118oC, take the saucepan off the stove immediately and pour the syrup slowly onto the still-mixing egg whites that should be at soft-peak stage.  If soft peaks achieved before it reaches the target temperature, reduce the speed to low to keep the whites moving. *egg whites must be moving*

Once you have poured all the syrup on the egg whites, turn the mixer on maximum and beat for 1 minute.  Lower the speed to medium and beat for another 2 minutes.  This will cool down the mixture while strengthening the meringue.  If you are coloring your shells, add the coloring at this stage (use powder or gel food coloring should be used, not liquid food coloring).  Your final meringue should be around 50oC. A 'stiff-peak' consistency is formed.


  • Combining the TPT and Italian meringue
Using a spatula, mix 1/3 of the meringue with the TPT mixture to loosen it up. Then fold the remaining meringue and TPT mixture. (You may not need all the meringue).  Use a folding technique, moving the bowl a quarter of a turn with each fold, and using brisk movements.

You want the consistency of the macaron batter to resemble a soft cake batter.  Another way to check the consistency is to fold a small amount of batter over the rest of the mixture.  The small amount of batter should flatten out and incorporate back into the mixture in about 12 seconds. The batter should smooth and runs in thick ribbons off of the spatula. 


  • Piping the shells
Create a piping template with a 1.5 inch diameter circles with 1 inch separating space.  Line baking sheets with piping template and top with parchment paper. 

Piping is one of the more challenging techniques but with time and practice, you will be able to produce perfectly round, even shells.

Prepare your piping bags and piping tips.  Place your plain round 1/2 inch diameter piping tip inside the piping bag.  Using a spatula, scoop the macaron batter into the piping bag, filling only half way.

To pipe, hold your piping bag vertically and about 1/2 inch above the surface of the pan.  With hand holding the piping bag, press the mixture with uniform pressure.  Use your other hand to control the distance between the tip and the baking tray.  Pipe each shell by squeezing the batter in one spot i.e. don't pipe by making circular movements.  Once you have piped the desired size, 'cut' the mixture using a quick motion so that you won't get a peak.  The batter may create small peaks immediately after piping, but if it is the correct texture these will smooth themselves in a minute or two.  If the batter is too stiff, the peaks will remain and the tops of the shells may not be totally smooth.  If the batter is too thin, the rounds will spread further.


  • Baking the shells
 Leave the piped shells to dry and form a crust at room temperature before baking (about 15 min - 1 hour depending on humidity).  Touch the batter with your finger, the batter should not stick to your finger and a thin film forms.  In this time, the piped shells will flatten and smooth out.

Baking temperature depends on the type of oven you are using.  Whichever oven you use, you need to let the steam escape while the shells are baking by placing a wooden spatula or wooden chopsticks in between the oven and the door.

Here is a general cooking guide:

Convection (fan-forced): Preheat oven to 150oC and bake shells for 25 minutes, while leaving a gap for steam to escape.

Static oven: Preheat oven to 170oC and bake shells for 25 minutes while leaving a gap for steam to escape.

Bake until the surface is smooth and set and 'feet' have formed around the bottom.  Once the shells are cooked, slide the baking paper off the baking tray and let the shells to cool (about 5-10 minutes).  They should come off the parchment paper easily and fully intact. Match the shells up in pairs and sandwich with the filling of your choice.


5.  Making the Macaron Filling

Macaron fillings are limited only by your imagination! The main macaron fillings fall into 3 broad categories
  •  Ganache
  •  Buttercream
  •  Fruit Preserve
Chocolate Ganache Ingredients:
225g cream
200g dark chocolate
75g butter

Chop the chocolate until you get flakes. Chop the butter into small cubes.

Boil the cream. Pour a third of the boiled cream into the grated chocolate and let sit for a few minutes to commence melting the chocolate.

Mix the cream and chocolate in a slow circular motion taking care not to incorporate any air.

Once you have a shiny and homogenous mixture, pour the remaining cream over the chocolate and repeat the mixing process.  The temperature of the chocolate should be about 55oC.

Add the butter and mix until the butter has completely absorbed into the chocolate.  Cover your ganache with clingfilm and leave in the fridge to set.

Pipe the ganache onto half the shells and sandwich with the remaining shells.


Sources:
Annie's Eats and Honey & Soy

Manuel Latruwe


Manuel Latruwe 
Belgian Patisserie & Bread Shop
1333 - 1 Street SE
Calgary, AB T2G 5L1
http://manuellatruwe.com/

Afternoon tea time at H&D's place!  We each picked a pastry from Manuel Latruwe and brew some David's tea for some delicious tea time.  The huuuuge meringue cookie is only $2.50 and it is sweet and deliciously chewy.  The almond croissant is super flaky.  Favourite cake of the series is definately the praline! The crispy wafer inside the mousse cake creates an interesting contrast, and of course can't forget the cute little macarons for decoration <3  Next time must sit at the place and order a pot of tea too =)

Almond Croissant $2.45

Black Forest $7.50 ***
chocolate cake, chocolate mousse, whipped cream, amarena cherries, milk chocolate

Praline $7.50 *****
almond dacquoise biscuit, crispy wafers of feuilletine, hazelnut mousse